

The following is a general guide for interpreting the Watermark readings.
cbars
0-10 ------------- Saturated soil
0-30 ------------- Soil is adequately wet (except for coarse sands which are beginning to lose water)
30-60 ------------ Usual range for irrigation (except heavy clay soils)
60-100 ----------- Usual range for irrigation in heavy clay soils
100-200 ---------- Soil becoming dangerously dry for maximum production.
(type 2) Gypsum Block specifications are based on information in Weather Toys book
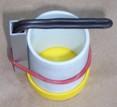
This is my attempt on making a mould the black strip across the top of the mould
is to support cable and to keep it from moving when casting
Welcome to Weather-Above

I have made several Gypsum block which have worked quite well.
After several months I decided to take out the Gypsum block and break it open.
On close inspection on the bare wires there was a lot of green colour corrosion.
Electrical wire I have used is stranded, it would be better to use solid wire for the electrodes.
For my curiosity I will conduct some experiment using different wire, test them a different electrode.
To see how I can make the in-house Gypsum block work efficiently, and last longer.
I will add a second moisture sensor for my experiments and run them alongside the watermark sensor.
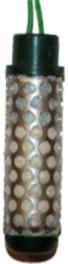
For the purpose of my weather station. I have installed a watermark sensor.
This is a proven sensor, and being in the field for quite some time.
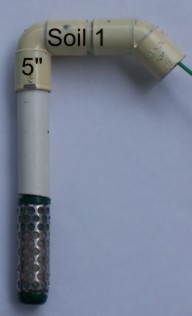
To mount the soil sensor, and to protect the cables,
Cut a small piece of plastic piping to your required depth , thread, the cable through the piping.
I have used a 90° angle bend and then a 45° angle bend. This will stop any rainwater following the lead down to the block.
This sensor is located in a very small area which contains lettuces.
Help Keep This Website Going! Please