Welcome to Weather-Above


Solar radiation aspirated shield project
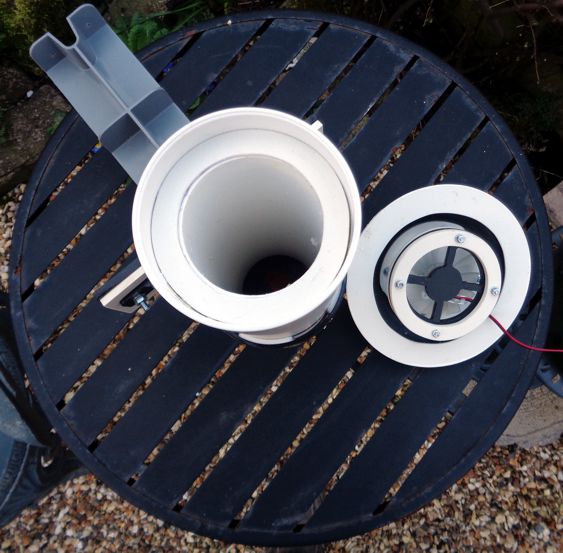
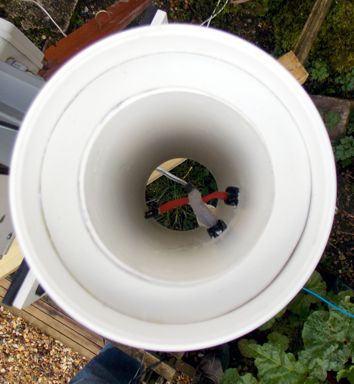
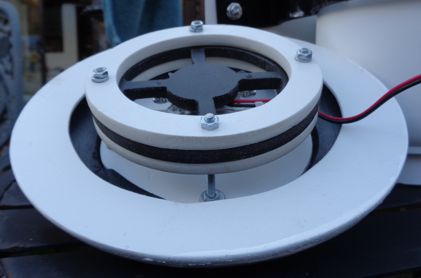
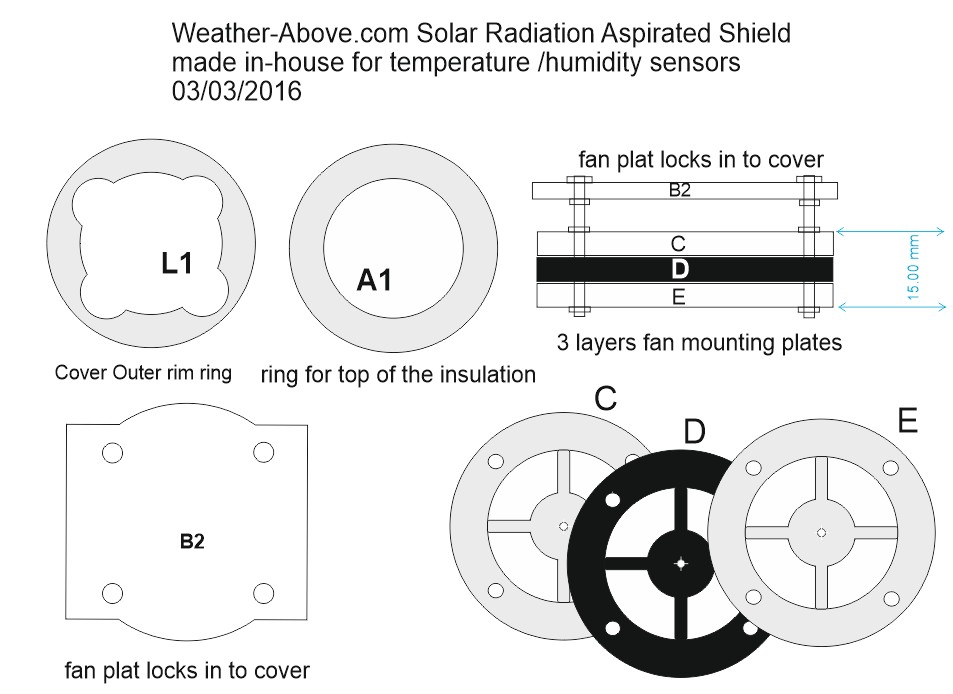
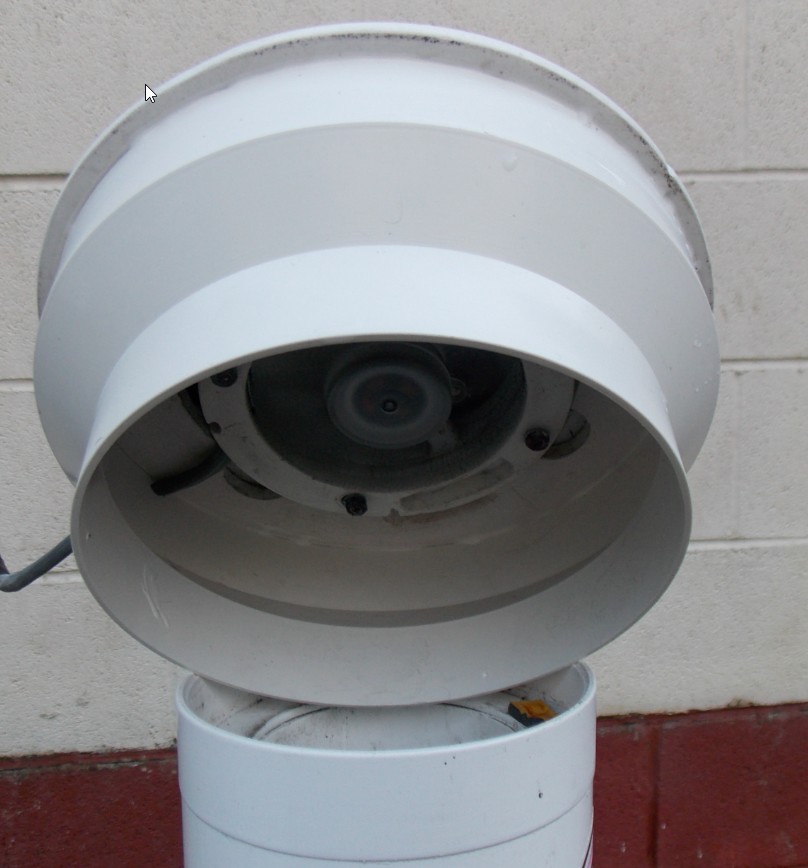
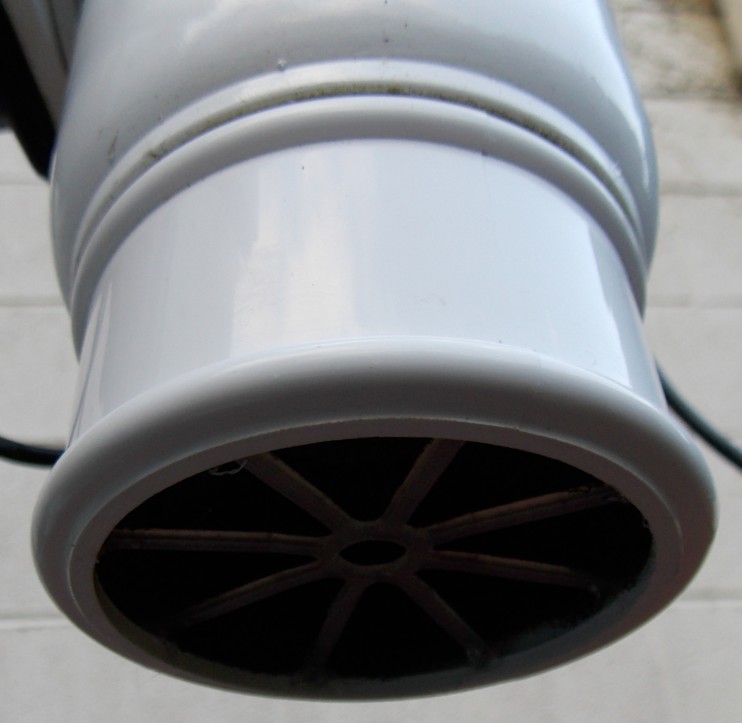
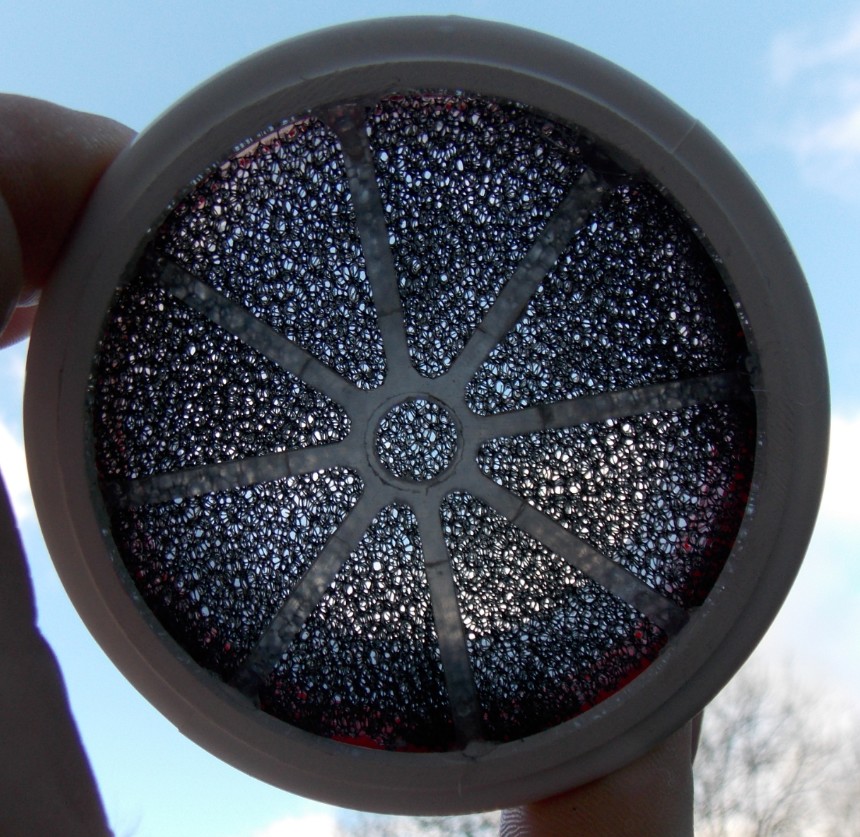
I have recently upgraded the solar radiation screen which has the temperature and humidity sensor mounted inside. The Outer Plastic Container was from a toilet brush holder, you need the type that is white opaque and the plastic as thick as possible also tapered, the top is wider than the bottom. I cut out a hole in the bottom to fit the inner pipe which is a piece of white plastic downspout, this forms the inner wall which was filled with liquid foam insulation. A large plastic ring was made to sit inside on top of the insulation foam. The Plastic used to make the top ring/fan plate holder and the cover outer rim ring were cut from a type of plastic which has a smooth top and bottom is sandwiched in between a very fine plastic foam; this material is commonly used for making outdoor signs (foam X) it is very easy to cut and has amazing insulation properties. The top housing has several layers of foam X and air gaps in between to form a substantial solar shield. The plastic on the outside has also been sprayed with a rubber paint to protect the outside plastic against the elements. Sensors are mounted through the side and a fan in the top draws the air through from the bottom over the sensors, it's important that the airflow does not alter the air temperature and humidity as you want them to be the same as the air in a shaded area, the fan is not very powerful just enough to draw the air through the tube. Near the bottom of the tube is a nylon mesh to keep any little bugs out, the temperature and humidity sensors are now at optimum performance when it starts to rain the humidity responds straightaway, no lag time due to the efficiency of the screen and airflow.
The transformer voltage is set to 7.5 V DC instead of the 12 V supply. This has lowered the speed of the fan just enough to allow a sample of air to move through the chamber over temperature and humidity sensor modules.This gives us the maximum performance and accuracy of the air temperature/humidity sensors at my location.
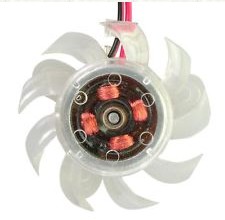
- Power: DC 12V
- Triangle Screw Distance: approx.
26mm between each two
- Mounting Hole Dia: approx. 2mm
- Dimensions(mm): approx. 45 mm(Diameter)
- Cable Length: about 100 mm
Max. Air Flow Volume: 22.8 cfm
Max. Fan Speed: 2800RPM
0.80 maps
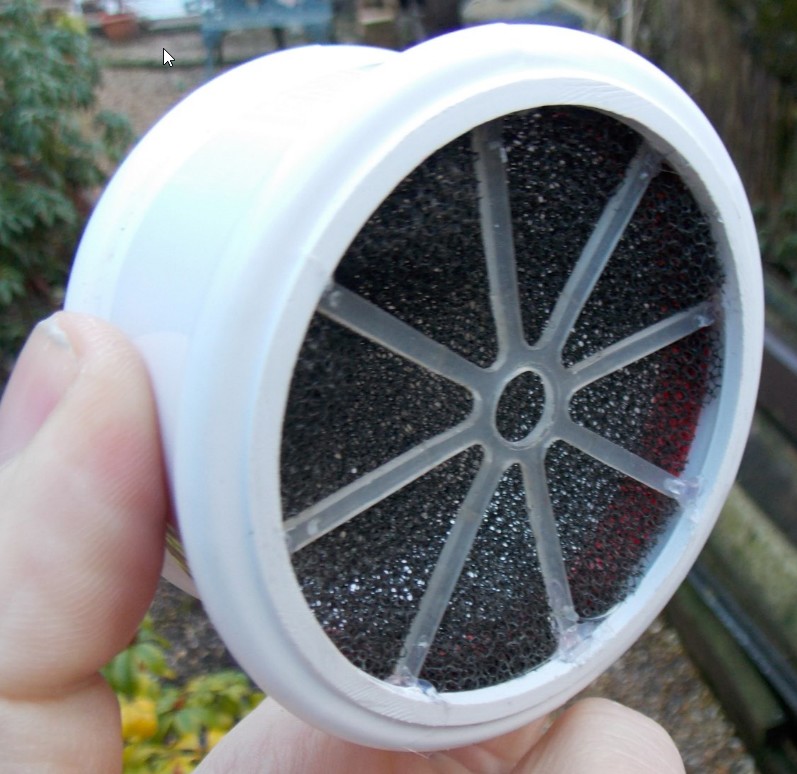
The solar radiation screen has the ability to attach different air inlet fittings with internal filter, adding different types of air inlet can help overcome situations where there is a structure close by and you want the airflow intake to come from a different direction
Update03/01/21
I've recently added a new side shield collar. This is pretty straightforward to add to the project. You can purchase these type of reducing collar from DIY shops . This was an exact fit to the top plate L1. This adds an extra reflector from the top side of the solar screen. The bottom of the solar radiation screen can use different types of air inlets. The one I'm using at the moment is a straight version which has a bug mesh installed. This can be easily removed for cleaning and maintenance
.jpg)
.jpg)

.jpg)
DC3V 3.7V 5V 6V Mini 24mm Round Solar Power
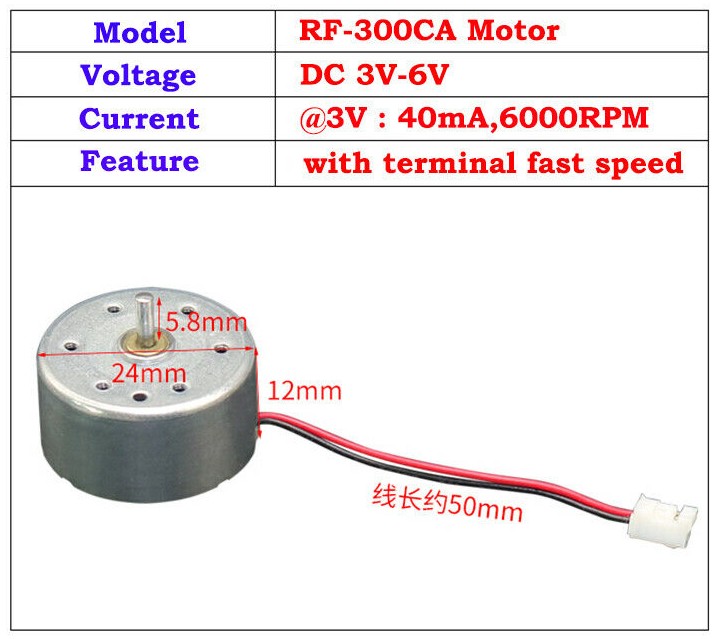
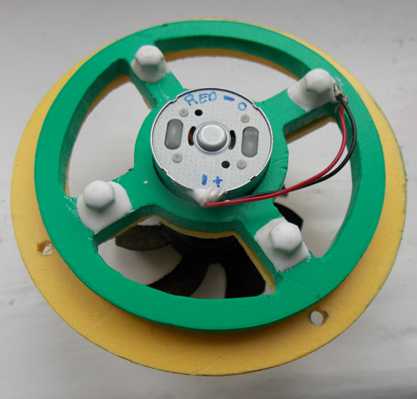
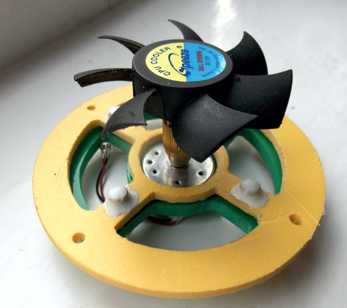
Replacement fan module:- The replaced screen fan has a motor which is more reliable than the previous fan . The fan power supply is 3Vdc medium speed for slow speed works really well at 1.5 V DC for very fast speed 6.0 V DC
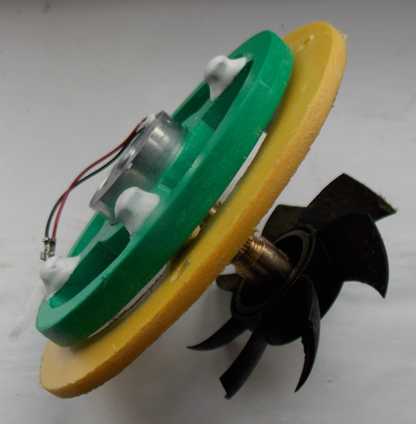
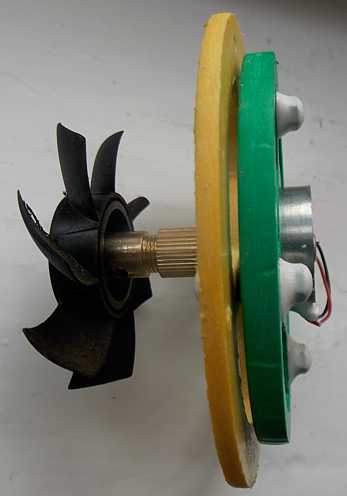
The motor is mounted in between two plastic discs with rubber spaces in between them which helps to reduce any vibration from the motor. At the end of the motor is a brass drill type fitting, you can find these on eBay. It allows you to use a small screw to lock one end onto the motor spindle and the other end, you can fit different types of fan spindles. The whole system is very easy to replace and is fully waterproofed when it's mounted in the housing.
Using this type of motor it is very easy to convert to run from a solar panel with a battery backup.