The first thing I do is to extract the earthquake event from AmaSeis helicorder ,
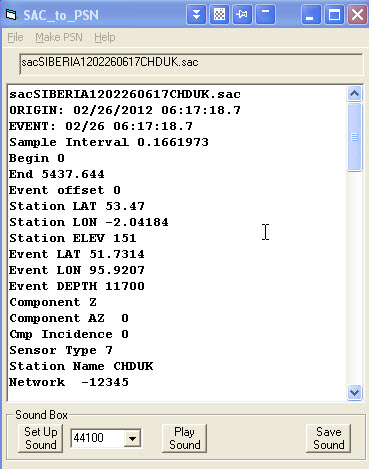
then I convert the SAC to a PSN format using a conversion tool, this tool can also make an audio file of the seismic event.
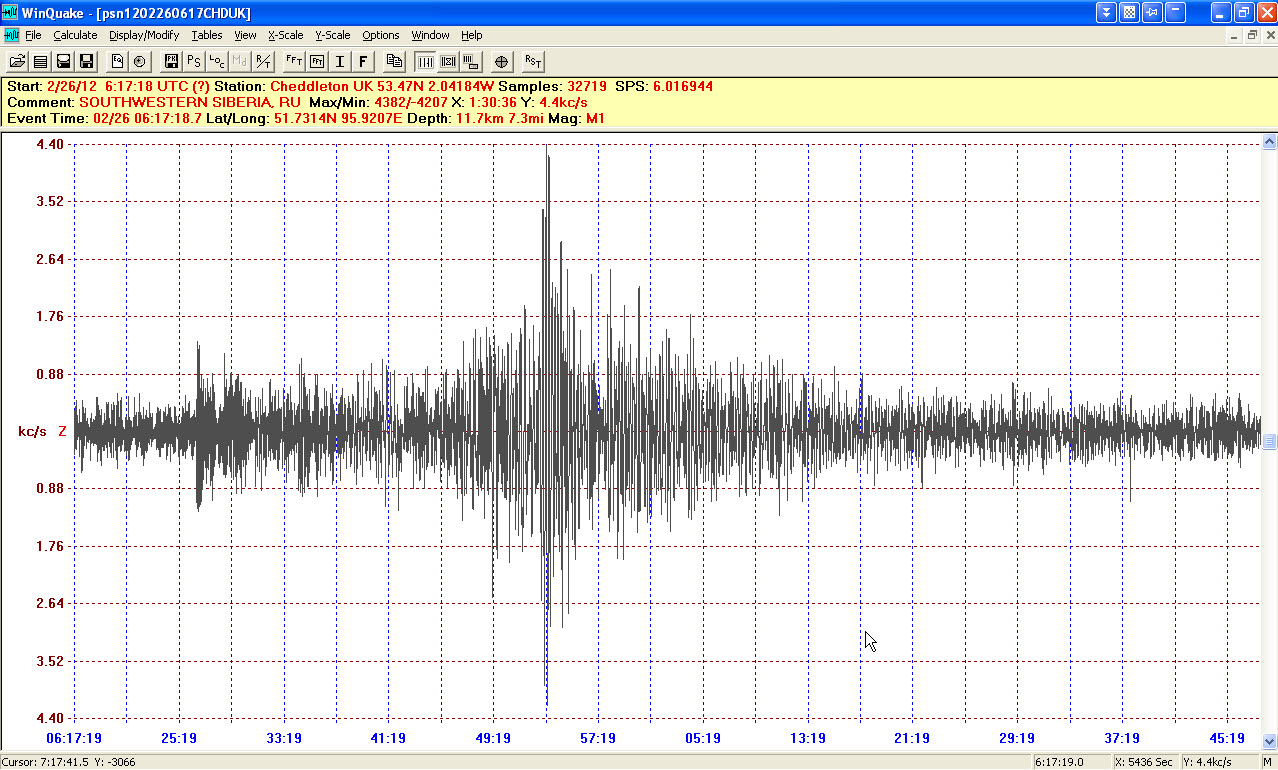
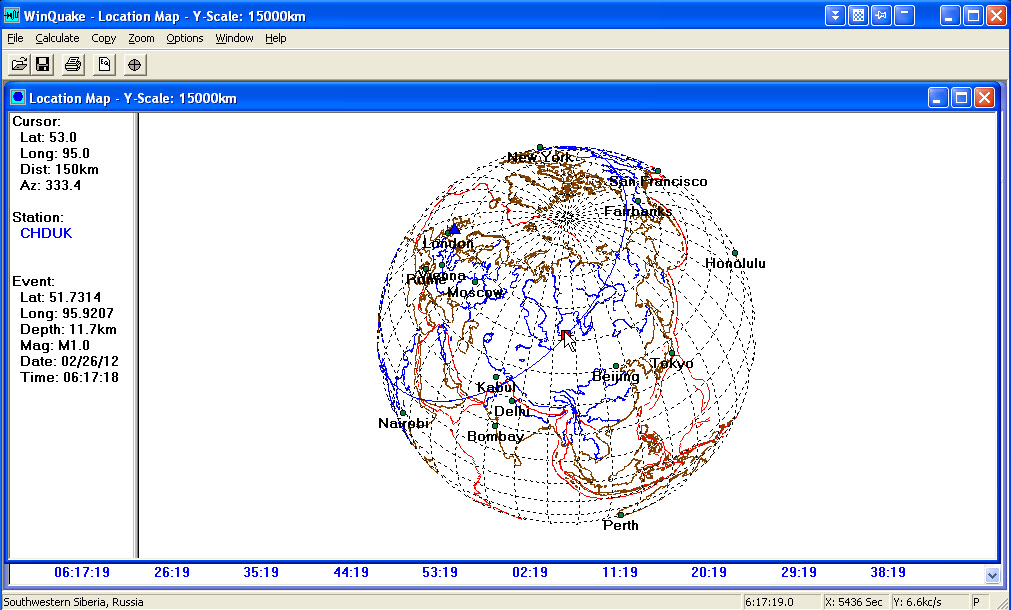
I start the winquake programme, you are presented with a window where you select the event file you to wish to look at in more detail. The earthquake event I'm looking at to place in South-western Serbia, Russia region on 26/02/2012 06:17:19 location 51.73N 95.92E depth 11.7 magnitude 6.7.
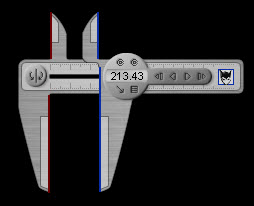
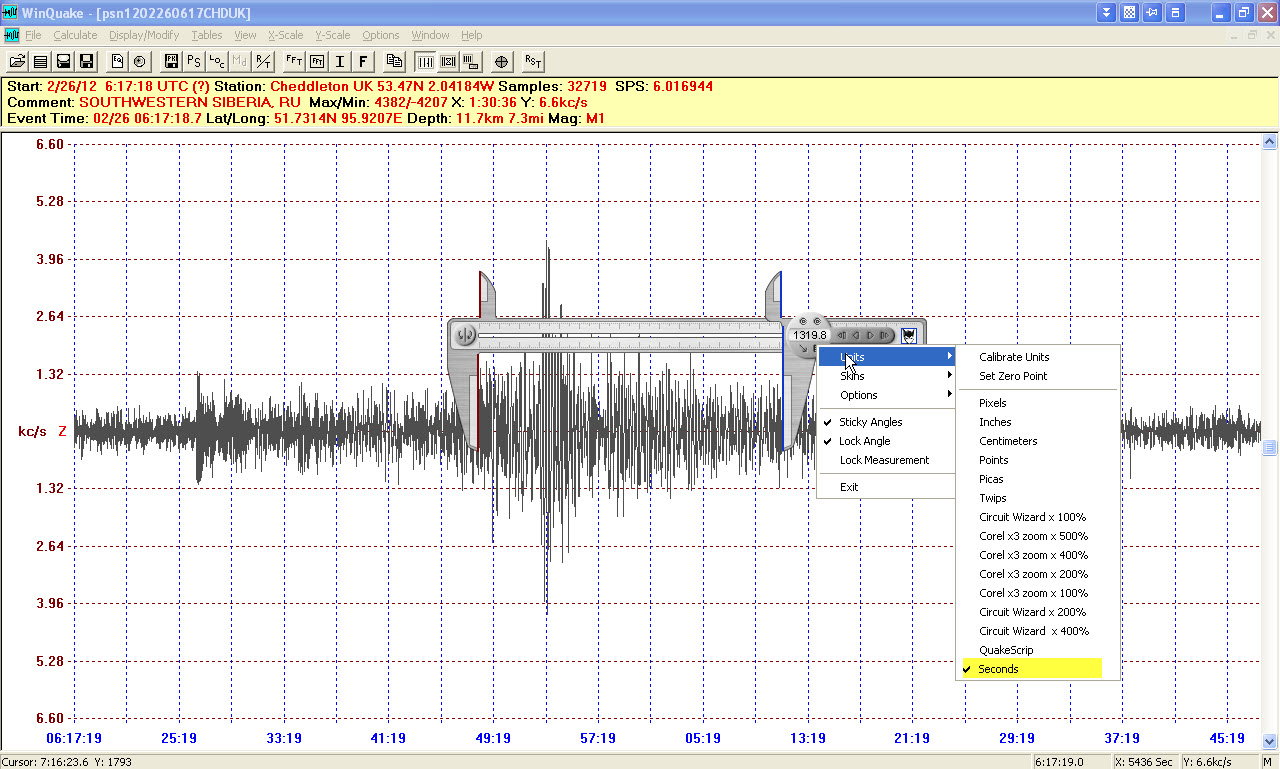
Screen caliper used for measuring time
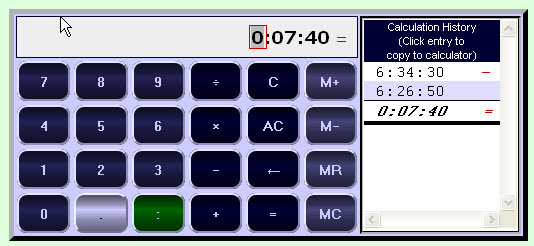
Time calculator is a useful tool for working out time
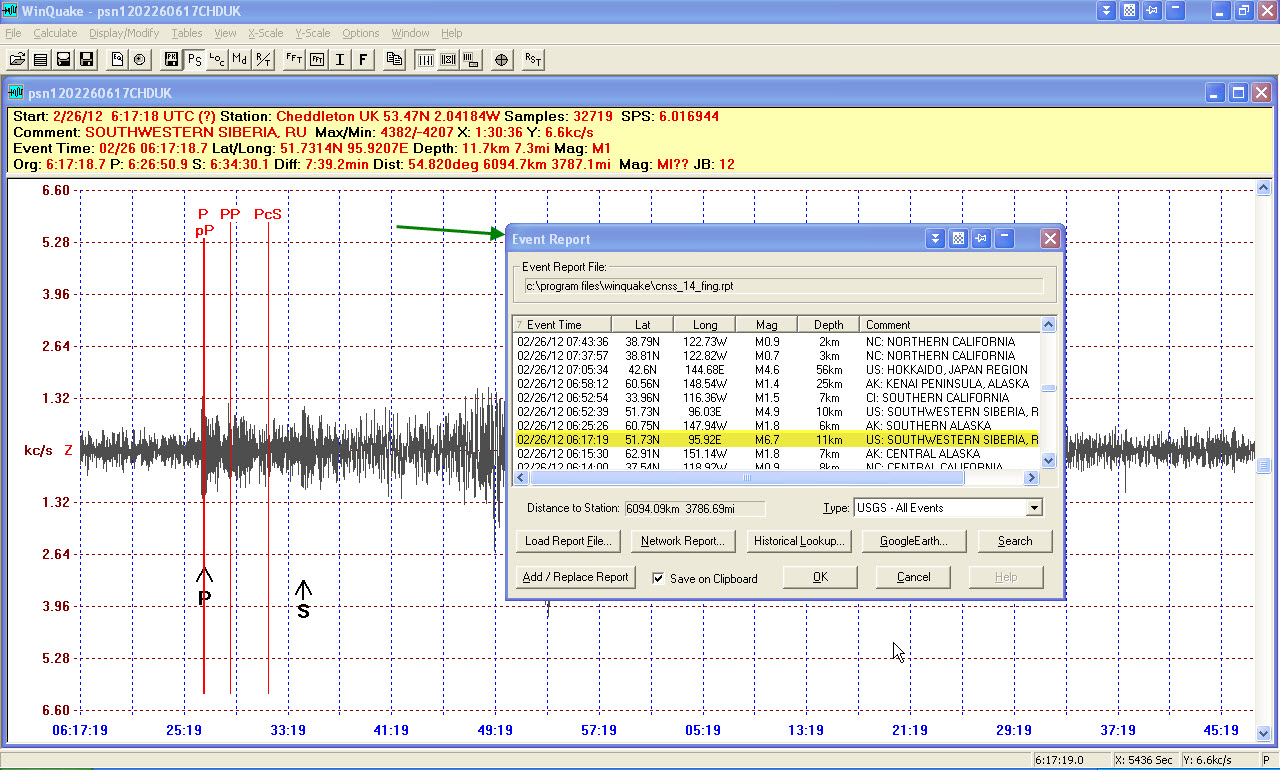
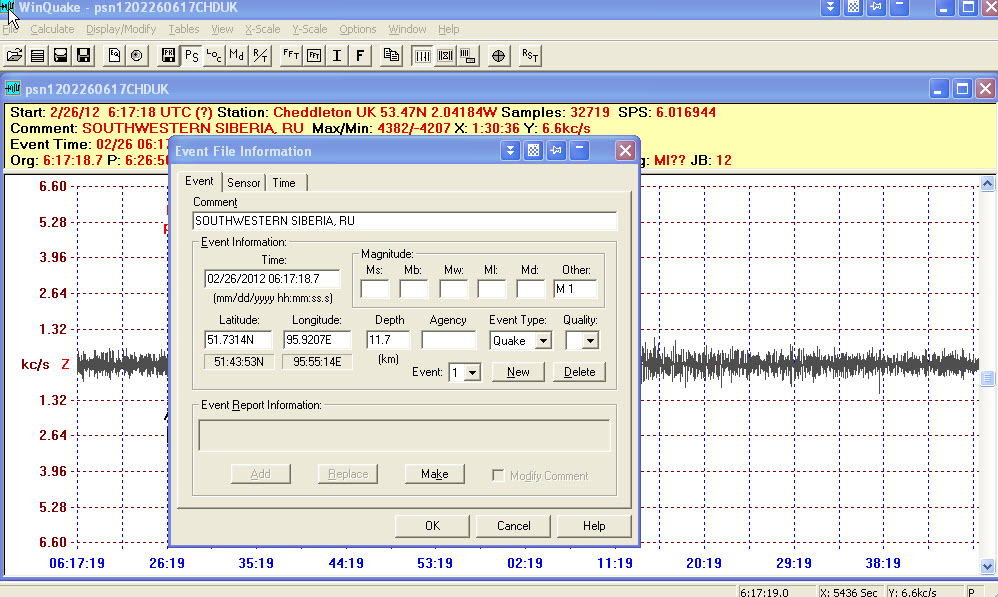
The next stage is to fill in all the event information, to find this information I click on file then select event report when this window opens in the type: box I select USGS -All Events, after a few seconds the window will be updated with all the latest earthquakes events from the USGS website.
Scroll through the event report and find the date and time of day event when I find an event that is close enough I then try to locate the P wave and the S wave by moving the markers, I make a note of the time of the P and S wave and recheck the event report window to find the event, with this information you need to fill in the event information window as seen above.
The next process, I click on the toolbar icon marked locate event, in this window an image is drawn with a triangle of my station position and a red square where the event has happened, if I have found the P and S wave correctly then a blue circle should be running through the red square, this is distance in degrees from my location. You can open other files from other stations you did the same thing to find the P and S wave and then a circle will be drawn in a different colour having three locations gives you the exact locationwhere this event took place.
How I use WinQuake with Screen Calipers
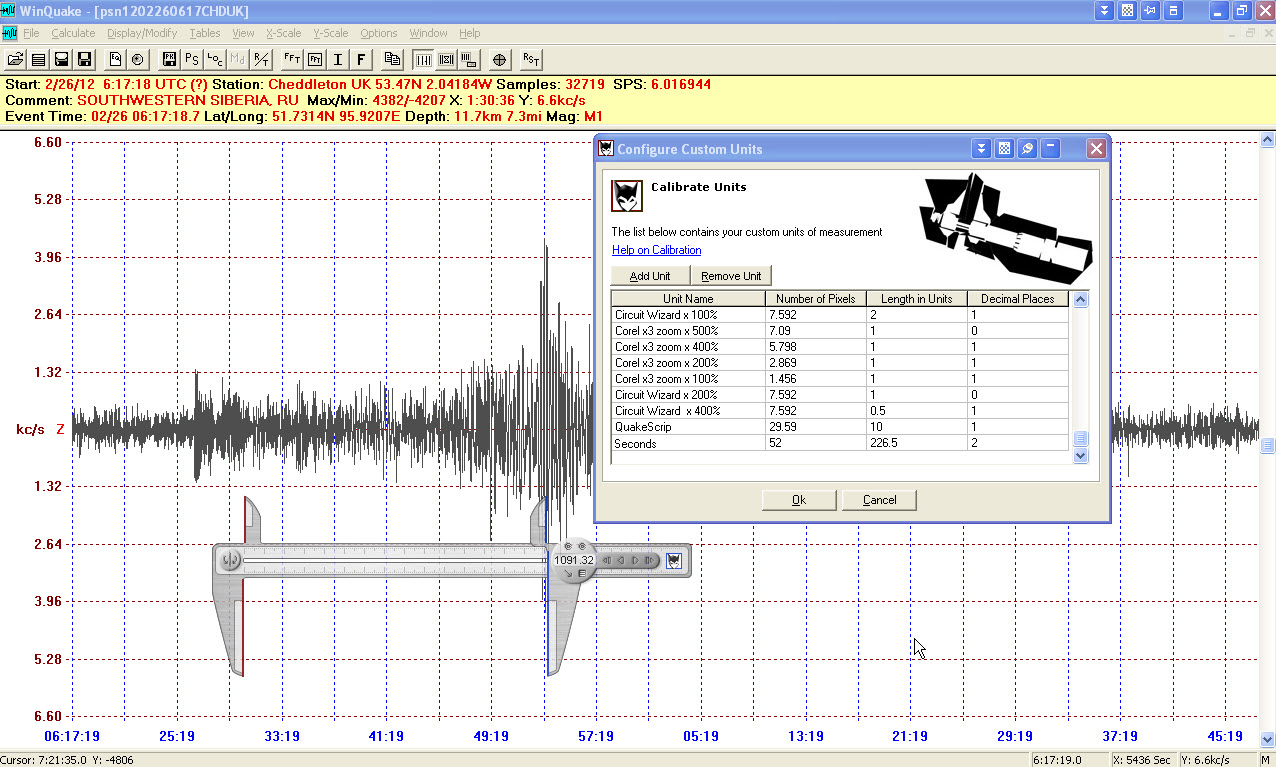
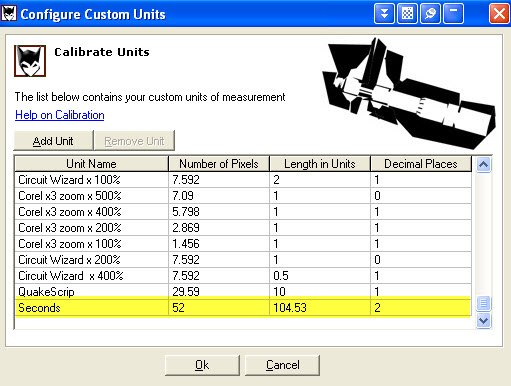
The next stage of analysing seismic event is to look at the different parts of the seismic wave. I start the screen Caliper Utility, to calibrate the calipers you need to know how many pixels per square in winquake you can do this very easily by selecting measure by pixels, on my computer screen this works out at 52 pixels. You need to look at how many seconds the winquake screen is set to this infprmation is displayed in the bottom right-hand side toolbar for the event we are looking at it equals 5436seconds , all you need to do then is to divide this by 52 this equals 104.53 enter this into the settings in the calibration of your calipers.
The last stage is to select the name of your new calibration data, in this instance I use the name seconds,the calipers are now calibrated exactly to the seconds in winquake.
You can start by measuring between the P and S wave to check that the time between them is correct to your data, the next stage is to try to identify other parts of the wave and have a look at the time arrivals, the calipers can be rotated in any direction, there are quite a few different skins to customise the look that you prefer to work with. For more information about the measuring tools please click on the link at the top called measuring tools software ,you can purchase just the calipers or you could buy the measuring pack which includes a Screen Compass,Screen Protractor,Screen Measurement Logger,another useful tool is the Screen Tracing Paper.
This is a basic overview there are many more features in the programme but I just wanted to cover some of the useful utilities and features in winquake.You will see at the top of this page a link to a time calculator this is very useful for working out time differences.
Please double-click on the images to see a larger version