
Welcome to Weather-Above
After reading some excellent articles on making you're own solar radiation shield
I decided to give it a go.
I brought 15 plant pot saucers. Choosing the right plastic is important.
Some manufacturers use a brittle plastic, when you try to cut into it It just cracks.
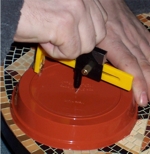
After selecting the best plant pot I cut off the edge with a pair of scissors,
This will stop the water congregating on the edge.
The next step was to find a way of cutting the centres out. I decided to use a.
Craft cutting compass it took a while, but it is well worth it.
The next stage was drilling three holes in each saucer to accommodate the threaded rods.
I made a template by cutting a round piece of card to the size of the saucer.
I decided where I needed the hole to be drilled and pierced the card with a pin.
I laid this on each saucer, using a felt tip pen to mark the spot to be drilled.
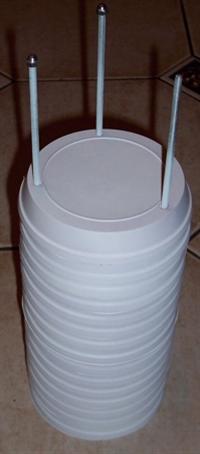
I cut some 10 mm in length tubing to use as spacers between each saucer.
On the fourth saucer I mounted a PC fan to give a constant airflow;
I will be running this off a 12 V transformer , as I am fortunate to have a power socket.
close by. My future project will be to make this powered by a solar panel.
Fig 4 PC fan
Mounted at the top.
Fig 5 Sensors mounting bracket
I cut out a mounting bracket for the sensor.
This is mounted in the centre hole this gives an evenly airflow from the fan.
Fig 6 Bug guard fitted.

DIY Solar Radiation shield


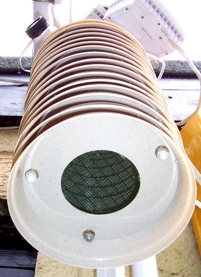
fig 5
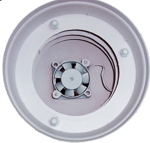
fig 6
fig 4
fig 3
fig 2
Help Keep This Website Going! Please